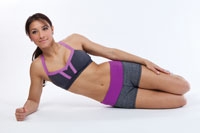
Abdominal workouts have evolved over the years, but studies have shown that all areas of the core need to be worked in order to support your spine.
Hollow out your abs, push your spine to the floor, brace your abdominals: you may have heard all of these terms during fitness classes or training sessions over the years, but with contradictory information about how to work your abdominals properly, how do you know what the correct way really is? Abdominal workouts have evolved over the years, but the abdominal crunch, or sit-up, for example, remains a staple in many workout programs today. Researchers, however, have recently determined that the traditional crunch puts extra load on the spine, potentially creating back problems. So what does a crunch look like? Crunches can be done on the floor, on exercise or BOSU balls, and even on incline benches. I recently saw them done from a machine where you strap your feet and lift yourself from an upside-down position. Starting from a flat-back position, exercisers generally place their hands behind their heads and round their backs as they come to a half-raised or fully raised position from the floor. In exercise modalities such as Pilates and yoga, the crunch can have different names, but has basically the same purpose. In yoga, the sit-up begins with your back flat on the floor, has you reaching all the way to your toes, and ends with you rounding your back. In Pilates, the abdominal roll-up is very similar: your back begins in a neutral position, but ends with a rounded spine and drawn-in (or hollowed) abdominals. The problem with crunches Exercises that focus on training the abdominals usually use the abs as the prime mover, instead of as the stabilizers, but this should not be the case, according to Dr. Stuart McGill, professor of spine biomechanics at the University of Waterloo and author of Ultimate Back Fitness and Performance (BackFitPro, 2009). “The muscles of your limbs are designed to create motion, and the muscles of the core or torso are designed to stop motion,” says McGill. He likens your spine to a wire coat hanger: “… if you wanted to break it, bend it back and forth, and it would slowly crack and then break; that’s what happens to discs of your spine. If you keep bending it, the discs eventually herniate; the more load on the spine while bending, the faster they herniate.” He says that instead of moving your torso to work your core, you should “… create motion around your hips and shoulders, but not your spine.” This may go against everything you’ve ever learned when it comes to abdominal exercises; gone are the bicycle crunches, the hip lifts, and the roll-ups. But this is not just some magic that McGill pulled out of a hat; his labs at the University of Waterloo have been studying spines for over 25 years. So what should you be doing to create strong, functional abdominals if not a traditional crunch or roll-up? The big three All areas of the core need to be worked in order to support what McGill calls a “guy wire system around your spine.” He explains that you need guy wires on all sides of your mast (core) to help you support loads. McGill has come up with three fundamental exercises for the core, which he has coined the “Big Three.”
1: The Modified Curl-up


Muscles worked: rectus abdominis Begin with your feet and back on the floor; place your hands under your low back (to increase the strength of your back).
- Lift one leg up to 90 degrees, and brace your abdominals (as if you’re going to be punched).
- Slightly lift your head and shoulders off the floor, barely coming up at all.
- Release
Make it harder (right): raise your elbows just barely off the floor.
2: The Side Bridge Muscles worked: obliques and quadratus lumborum Lying on your side, keep your knees on the floor and place your elbow on the ground under your shoulder.


- Hold for 10 seconds; when you are stronger you can hold it longer.
- Repeat 3 more times; switch sides.
- Rest 1 minute, repeat 3 times, rest, repeat 2 times, switching sides each time.
Make it harder (right): bring both knees off the floor and stack the feet. Place your top hand on your opposite shoulder.


Muscles worked: latissimus dorsi, erector spinae, rectus and transverse abdominis, gluteus maximus

- Stretch your opposite arm and leg out until they are parallel to the floor.
- Come back, touching the floor, and repeat.
Note: once your spine is in a perfect neutral posture, you can lightly brace the abs before initiating the shoulder and hip motion. Make it harder: sweep your hand and knee over the floor so they barely touch; clench your hand as you raise your arm.
The fourth

Another exercise, though not included in the Big Three, is also recommended by McGill: “Stir the Pot.” Muscles worked: transverse abdominis and obliques
- With your feet on the floor, place your elbows on a Swiss ball, keeping your shoulders over your elbows. You are now in a plank position.
- From here, move your elbows around in a circle one way, and then go back the other way.
- Keep the rest of your body still.
Essential equipment Ab equipment that requires weight should be avoided. Stick with the basics:
- a comfortable mat
- an exercise ball
Choose wisely Before you begin your ab workout, try to avoid:
- hollowing your abdominals (drawing in the navel rather than tightening the entire core)
- placing unnecessary load on your spine
- abdominal machines that twist with weight
- keeping your back flat on the floor
- any kind of crunch
By following these guidelines, you will take the stress off your spine, and put it into the core muscles.


