If someone had said 30 years ago that I’d live on a farm, growing vegetables, with cows leaning over a fence, I would have looked at that person in sheer disbelief.
I’ve always lived in the city—with no connections to farming whatsoever. My parents had a little urban vegetable garden in the backyard, and other than eating what they harvested, that was pretty much my awareness of garden to table. Fast forward: I wish I had paid closer attention.
Lesson No. 1
Start your family appreciating where their food comes from when they’re young. Spoiler alert—it’s not from a frying pan.
Over the years, a longing to move to a more rural area and grow my own food began to sprout. Recently we took the leap. My husband and I are now living on a small farm—cultivating the “sprout.” Coupled with our steady day jobs, we are energetically growing vegetables—and learning how to do it all is no small feat. It takes a lot of will and a strong back with a hinge.
The farm we acquired was fallow, other than nurturing pregnant cows who graze the pasture over the spring, summer, and fall seasons, so transforming this little acreage to provide food was not without its challenges.
We chose an old paddock that had been dormant for a number of years because it has great sunlight and access to water. And it was far enough away from cows looking to stretch their necks through the fence for a snack.
Lesson No. 2
Pick a sunny and bright location with a good water source.
We tilled the soil and sent off a sample to a local lab for testing. We learned that aged hog fuel in the paddock was not a good base in which to plant seeds. I hoped that years of weather and decay might have made this good ground mulch. But other than having great drainage, we needed quality soil trucked in.
Lesson No. 3
Test your soil, and if lacking, be sure to purchase good quality soil to supplement. It’ll make for happy plants and reward your efforts in the long run.
We decided to frame in raised beds, and scavenged demolition sites online. We found enough untreated fir to build six large raised beds 20 in (50 cm) high by 12 ft (3.7 m) long by 4 ft (1.2 m) wide to fit half the paddock. Then we ordered 10 yards of good quality soil and about half as much organic manure from a local reputable mushroom grower.
Once the beds were established, we hunted and pecked for a collection of organic seeds that would provide instant gratification. Other than acquiring organic tomato seedlings from a niece and some organic pepper plants from a friend, the bulk of our veggies were started directly from seed and tucked right into the fresh soil.
With the long bright evenings, we were able to plant every square foot of the prepared garden. All we had to do was water and wait. And weed, and weed, … and occasionally feed. Weeding we did nightly, as The Paddock was home to a lovely crop of horsetail.
What we planted
- kale
- Swiss chard
- eggplant
- heirloom carrots
- spinach
- a variety of herbs
- purple kohlrabi
- arugula
- mizuna
- cilantro
- snap peas
These are essentially all foods we love to eat and cook. We also planted potatoes in large burlap sacks and took a gamble on something new—borlotti beans for freezing or drying.
Lesson No. 4
Water, weed, and weed, and … feed.
Regular fertilizing is essential for a healthy crop. We sought out a few online sites and fertilized with mixtures of organic composting tea. Before long, tiny little shoots began popping up in nice even rows. Thinning the weaker plants to create space for the stronger ones was difficult to do. In my thoughts, every seed that sprouted needed a chance. But everything online advised the benefits of culling. So I gathered up the tiny discarded shoots and tossed them into salads.
Lesson No. 5
Not all beds need to be planted at once. Succession planting gives you gradual harvesting throughout the season. Check out what does well in your region and stagger planting seeds.
And the final lessons ...
The truth is there is no “final” lesson when it comes to growing your own food. But what we have learned is that vegetable growing is such a gratifying process. No season is an exact duplicate of the previous one. From sunlight to rainfall to temperature, each year brings a new experience with its own rewards—and the occasional challenge.
Since our rudimentary start on the farm, we’re learning to choose plants that do well in our climate and support the typical recipes we eat, freeze, and can, including unusual spring greens, summer peppers, garlic and tomatoes, fall squash, and dried beans. And in the off-season we heavily mulch and fertilize ... then wait until spring.
Anyone can get on the farm-to-table hay wagon
Those who want to plant in small spaces, such as an apartment window ledge, balcony, strata patio, or townhouse plot, can grow delightful edible plants throughout the summer season. Such confined places offer great convenience for growing greens and other vegetables well into the off-season, given the protective conditions.
Consider tower or vertical gardens, where you can grow leafy greens vertically all year round. Keep in mind the same principles as growing in a field apply: good light, good soil, water, a little warmth, weeding, and feeding.
Get growing! And then enjoy the harvest by trying some of our garden to table recipes!
Cleaning garden-fresh produce
Cleaning organic vegetables, making sure there are no garden pests, is a seamless effort when using this approach.
- Add 1/4 cup (60 mL) 3% hydrogen peroxide to a sink full of cold water.
- Plunge freshly harvested produce into sink and swish thoroughly.
- Then rinse with cold water and drain.
Garden to table recipes
Mizuna, Chard, and Baby Romaine Salad

Roasted Garden-Fresh Ratatouille

Roasted New Potatoes and Arugula Salad

Savoury Borlotti Bean Soup

Seared Tuna Loin on Garden-Fresh Salad with Borlotti Beans

Kale and Walnut Pesto

Whole Wheat Potato Gnocchi

Zesty Kohlrabi Remoulade Salad

Renee Blackstone’s garlic coins
Preserving garlic for the winter is the best thing you can do for any garlic crop. Here’s a fabulous way to preserve garlic for the winter. Renee Blackstone, writer and food aficionado, provided this wonderful way to preserve fresh summer garlic for endless winter enjoyment.
Ingredients
- 1 bountiful harvest of fresh garlic
- Extra-virgin olive oil
Directions
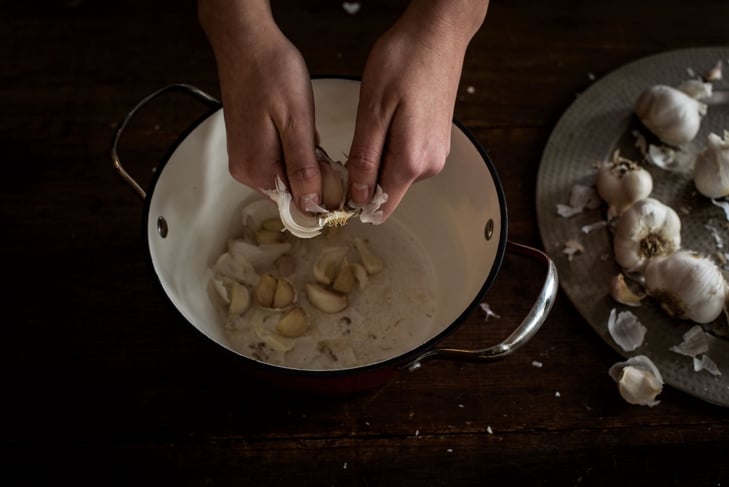
Break large heads of garlic into cloves, and place cloves in a bowl. Cover with boiling water to loosen skins. When cool enough to handle, drain and peel off skins. Spread blanched cloves on baking sheet and blot with paper towel. Set aside to dry thoroughly.


Measure out 4 cups (1 L) blanched cloves. Place in food processor and whirl until finely chopped or puréed, depending on your preference. Return to bowl and set aside for at least 5 to 10 minutes, as its health-giving active compound, allicin, takes about 5 minutes to develop.

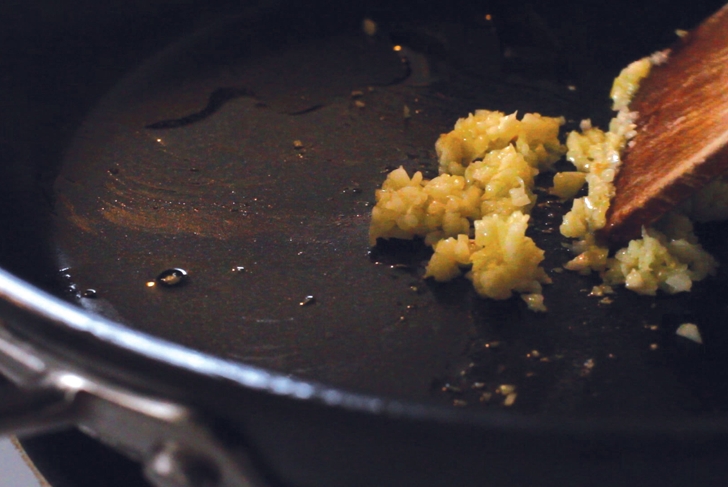
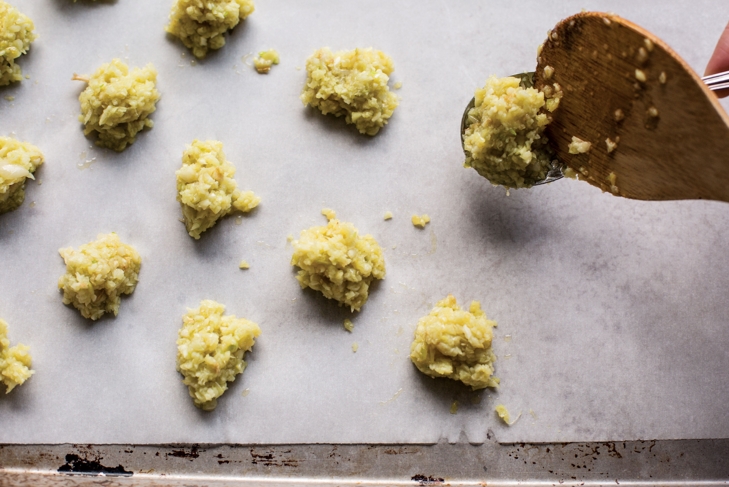
Line large baking sheet with parchment paper. In frying pan, heat about 1 tsp (5 mL) extra-virgin olive oil. Add generous spoonful of processed garlic to pan and sauté for 1 to 2 minutes. Transfer onto prepared baking sheet in a small mound, like a large coin shape. Repeat process, sautéing garlic in oil and dropping onto baking sheet, spacing garlic coins far enough apart. Place a second layer of parchment paper on top and slightly press down, causing coins to flatten. Continue adding coins of sautéed garlic until all garlic is used up.


Cover baking sheet with plastic wrap and freeze. When firm, remove garlic coins to container with airtight lid and press plastic wrap between coins. Cover top of coin stack with crumpled wrap to prevent freezer burn and seal container tightly. Return to freezer. Keep frozen until ready to use.

To use garlic where requested in recipe, simply take a garlic coin from freezer and drop into heated pan to thaw.

Check out the video for Renee Blackstone’s Garlic Coins on alive.com/video.


