banner
alive logo
FoodFamilyLifestyleBeautySustainabilityHealthImmunity

Chicken Wraps with Minty Pea Hummus

Serves 4.

    Share

    A spread of vibrant pea hummus adds an extra layer of nuance to these lunch wraps—a great way to breathe new life into your sandwich routine. If desired, sorrel or basil can replace the mint in the hummus. And if you want to go plant only, slices of smoked/baked tofu are a good stand-in for chicken. Go ahead and use leftovers of the hummus as a dip or a spread for other sandwiches.

    Advertisement

    Nutrition bonus

    Green peas contain more plant-based protein than most people would think—about 8 g in each cup (250 mL).

    Bowled over

    You can go bread-free by turning this into a lively lunch bowl. Place some lettuce greens in a bowl and top with cooked grains such as spelt or quinoa, then chicken, carrot, and roasted red pepper. Whisk together some hummus, with additional olive oil and lemon juice to thin, and drizzle over contents of bowl. Top with microgreens or pea shoots.

    Advertisement

    Chicken Wraps with Minty Pea Hummus

      Ingredients

      • 2 cups (500 mL) shelled green peas
      • 1/2 cup (125 mL) fresh mint
      • 2 Tbsp (30 mL) tahini
      • Juice of 1/2 lemon
      • 2 garlic cloves, peeled and chopped
      • 1/2 tsp (2 mL) ground cumin
      • 1/4 tsp (1 mL) salt
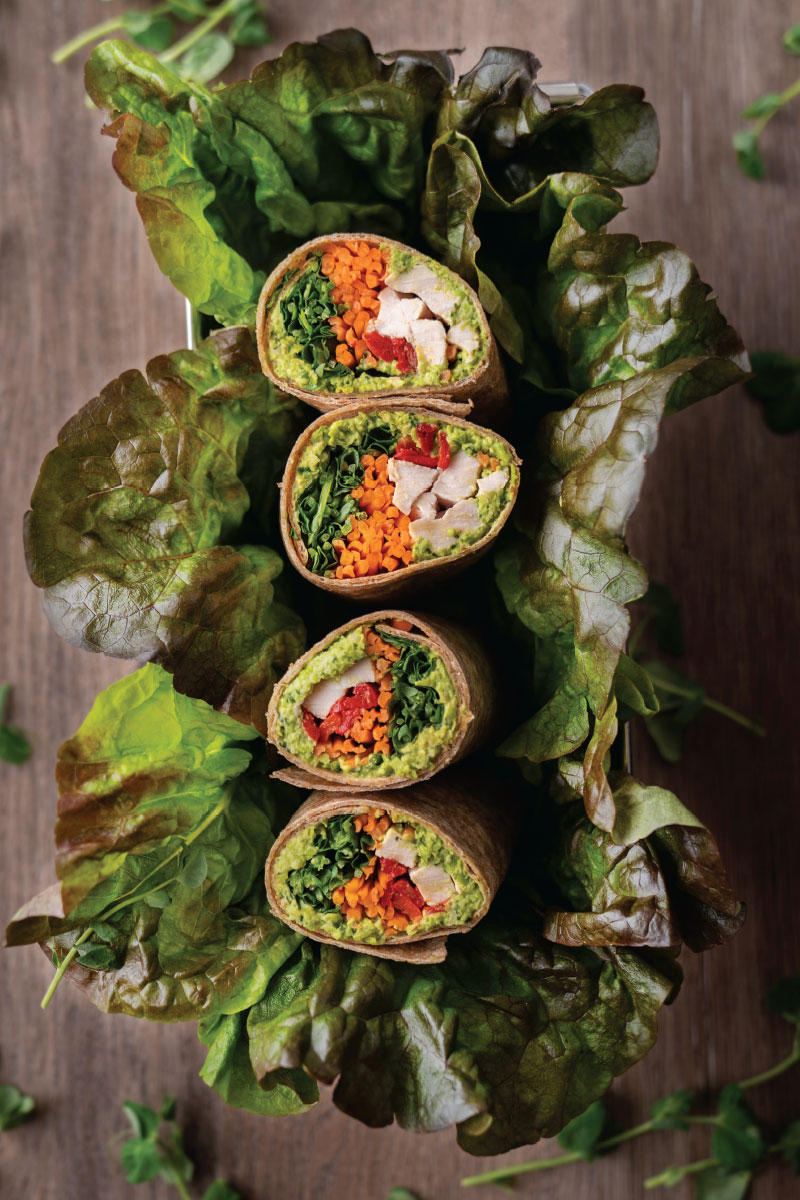
      • 4 large whole grain wraps
      • 3/4 lb (340 g) cooked chicken, sliced
      • 1 large carrot, sliced into matchsticks
      • 1 cup (250 mL) sliced roasted red pepper
      • 2 cups (500 mL) microgreens or pea shoots

      Nutrition

      Per serving:

      • calories449
      • protein37 g
      • total fat12 g
        • sat. fat2 g
      • total carbohydrates50 g
        • sugars6 g
        • fibre11 g
      • sodium530 mg

      Directions

      01

      In food processor container, place green peas, mint, tahini, lemon juice, garlic, cumin, and salt, and blend until you have a slightly chunky mixture.

      02

      To assemble each wrap, spread about 1/3 cup (80 mL) hummus on bottom third of a tortilla and top with one-quarter of the chicken, carrot, roasted red pepper, and microgreens. Roll up from the bottom, tucking in sides as you go. Slice in half on bias.

      Advertisement
      Advertisement
      Advertisement

      READ THIS NEXT

      SEE MORE »
      Leek, Charred Spring Onion, and Garlic Scape Soup
      Food

      Leek, Charred Spring Onion, and Garlic Scape Soup

      Leek and potato soup is a spring classic and really shines with new-season leeks. This soup takes the classic recipe a step further in a celebration of spring alliums by adding charred spring onions and garlic scapes, the immature flowering part of the garlic plant. Unlike the garlic bulb, scapes impart a gentler, fresher garlic flavour. Garlic—two for one Hardneck varieties of garlic, such as Russian Red, develop a flowering stock called a scape, which extends from the plant in a green coil. Growing your own garlic will give you two crops—a crop of bulbs in late July and, prior to that, in late May or early June, tender garlic scapes. Harvesting garlic scapes, before they flower, not only provides a delicious crop you can use in myriad ways but also essentially helps the plant divert its energy to producing the garlic bulbs—the part we use most often. Scapes are ready to harvest when they curl downward and begin to coil.

      Roasted Artichokes with Serrano Ham and Marcona Almonds

      Roasted Artichokes with Serrano Ham and Marcona Almonds

      Artichokes can be somewhat intimidating. But once you’ve made your way past its spiky exterior and removed the thistlelike choke, there lies a tender heart with a sweet flavour. The meaty bases of artichoke leaves are also edible and make perfect dipping vehicles to scoop up sauce or, in this case, a stuffing with just a touch of Spanish serrano ham and Marcona almonds. Artichokes take a bit of care to prepare—and to eat—but they present a wonderful opportunity to slow down and savour flavourful ingredients. Don’t be afraid to use your hands! How to clean an artichoke Fill a bowl large enough to accommodate artichokes with water. Cut a lemon in half, squeeze the juice into water, and drop lemon halves into water. Cut a second lemon in half and set it aside. You’ll use this to brush the artichoke as you trim it to prevent the blackening that occurs as the artichoke is exposed to oxygen. You can also rub your hands with lemon, which will stop your hands from blackening. Wash and dry your artichoke. Remove tough leaves around the base of the stem by pulling them away from the body of the artichoke, rubbing artichoke with lemon as you do so. With serrated knife, cut through artichoke crosswise, about 1 in (2.5 cm) from the top. Rub exposed part with lemon. With kitchen shears, remove spiky tips of remaining outer leaves. Use peeler to remove small leaves near the stem and the tough outer layer of the stem. Rub peeled stem with lemon. Using serrated knife once more, cut through artichoke lengthwise, severing the bulb and stem. Again, rub all exposed parts with lemon. Use small paring knife to cut around the spiky, hairlike choke and then use spoon to scoop it out. Rinse artichoke quickly under water and then place in bowl of lemon water while you prepare the remaining artichoke.